How to Use Mac Keyboard Shortcuts to Save Hours Every Week
When my old MacBook Air was compatible with USB 3.0 gadgets, I used a wireless Logitech mouse with a scroll wheel that went everywhere my MacBook did. That’s how much I dislike the Magic Mouse and trackpad.
The Macs I use now are USB-C compatible, so I had to find an alternative. And while I didn’t get lucky with a compatible mouse, I discovered the world of keyboard shortcuts.
I knew the usual suspects already — shortcuts for commands like ‘Quit App’, ‘Copy/Paste’, and ‘Save’. But, over time, I developed a system by which the keyboard is my main tool to get around my computer and even get around the internet.
The result is simple: I work faster.
There was some initial time involved to set up the system, but the time I’ve saved using keyboard shortcuts has more than made up for the time it took to program them.
We’re going beyond the usual suspects here. In this post, I’m going to:
Share a few native keyboard shortcuts I use daily
Show you how to create your own keyboard shortcuts
Introduce you to Alfred to go (nearly) mouse-free
Which keys can you use to create keyboard shortcuts?
Before we go into some different ways to make your Mac experience keyboard heavy, let’s take a look at the basic keys and symbols you can use to create shortcuts.
Many of these symbols will be printed on your keyboard, but I can tell you from experience that, over time, you might end up scraping them off just from regular wear and tear while typing.
⌘ = Command (or Cmd)
⇧ = Shift
⇪ = CAPS lock
⌥ = Option (or Alt)
⌃ = Control
You can use a combination of these keys and the number and letter keys to create your own custom keyboard shortcuts.
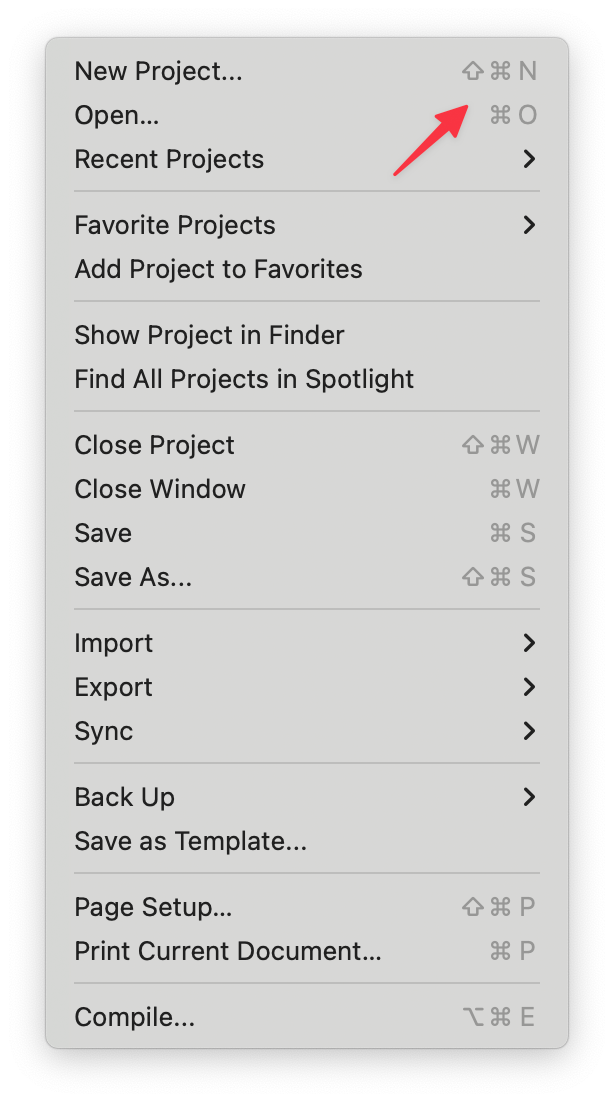
If you favour the mouse, you’ll have noticed these symbols in the menu items for the programs you use. Here’s a screenshot from the File menu of Scrivener (the program I write in), where you can see that keyboard shortcuts use two or three key combinations for different actions.
4 ways to make the move from your mouse to keyboard
1. Use Mac’s native keyboard shortcuts
Let’s start with the simplest way — use the shortcuts that come straight out of the box.
Many people have written detailed guides on the keyboard shortcuts that come built in with native Mac apps and features such as Finder, Spotlight, and screenshots. Rather than repeat what’s already out there, I’ll share just the ones I use most frequently, often multiple times a day:
Open a file from the Finder: (Command ⌘) + (Down ↓)
Open preferences for the active program or app: (Command ⌘) + (Comma ,)
Take a screenshot of a portion of the screen: (Command ⌘) + (Shift ⇧) + 4 — this brings up a crosshair cursor for you to select the portion of your screen you want to capture
Type an em dash: (Shift ⇧) + (Option ⌥) + (Dash -)
Open the emoji finder: (Command ⌘) + (Control ⌃) + Space (hat tip to Kirsti Lang for introducing me to this one!
If you’re looking for more, this post from Dan Rodney has an exhaustive list of shortcuts with clear, simple explanations for how to get around your Mac using your keyboard.
2. Use keyboard shortcuts specific to each app
Like native Mac apps, other apps or programs will have their own keyboard shortcuts for commands that are specific to them, e.g. mute/unmute for video calling apps, or rich text formatting for word processing or spreadsheet apps.
The ones I find myself using most often are mute/unmute the microphone and turn video on/off in Zoom and Google Meet.
| App | Command |
| Zoom | Mute/Unmute: (Command ⌘) + (Shift ⇧) + A |
| Video On/Off: (Command ⌘) + (Shift ⇧) + V | |
| Google Meet | Mute/Unmute: (Command ⌘) + D |
| Video On/Off: (Command ⌘) + E |
Some apps have made it handy for you to find their keyboard shortcuts — just press (Command ⌘) + (Shift ⇧) + / to open up the ‘Help’ menu. If it’s available, you’ll find ‘Keyboard Shortcuts’ right there.
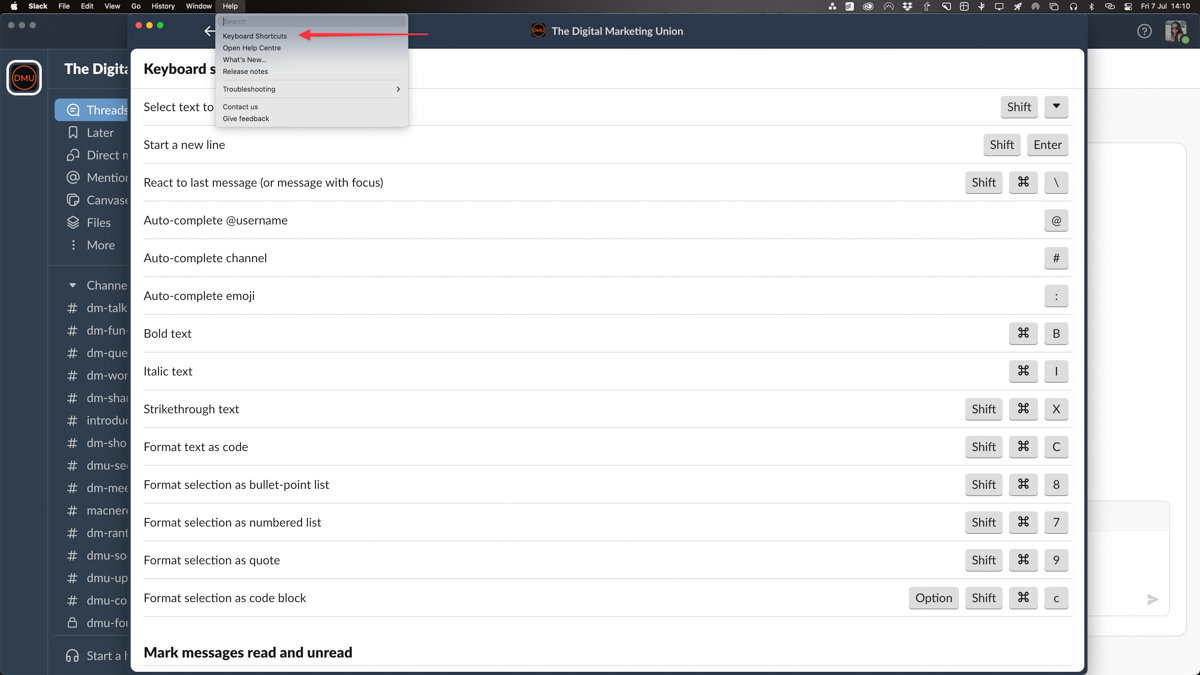
As you can see from the screenshot of Slack above, it’s a long list! You don’t need to remember them all. Think of the commands or actions you perform most often and look for the corresponding shortcuts. You can, quite simply, ignore the rest.
Most apps will also use the same combinations for basic commands like ‘New Project/Document’, ‘Open’, ‘Save’, ‘Save As’, ‘Undo’, etc., making these easy for you to remember and use.
3. Set your own keyboard shortcuts
Using System Preferences
Let’s take it up a notch and customise keyboard shortcuts for any app. Why would you want to do this? For me, it’s primarily because some commands don’t have a keyboard shortcut built into the app.
Check the menu bar for each app and find the commands you’ll use most frequently. Here’s a screenshot of the Edit menu in Asana, the app I use for project management.

You’ll notice a couple of commands don’t have shortcuts, and you can set your own from System Preferences.
Here’s how:
1. Note the exact name of the menu command you want to create a shortcut for. If it’s a sub-menu item (i.e. hidden under an arrow, like the commands hidden under ‘Speech’ above), use the final command name only. For this post, I’m going to create a shortcut for ‘Redo’.
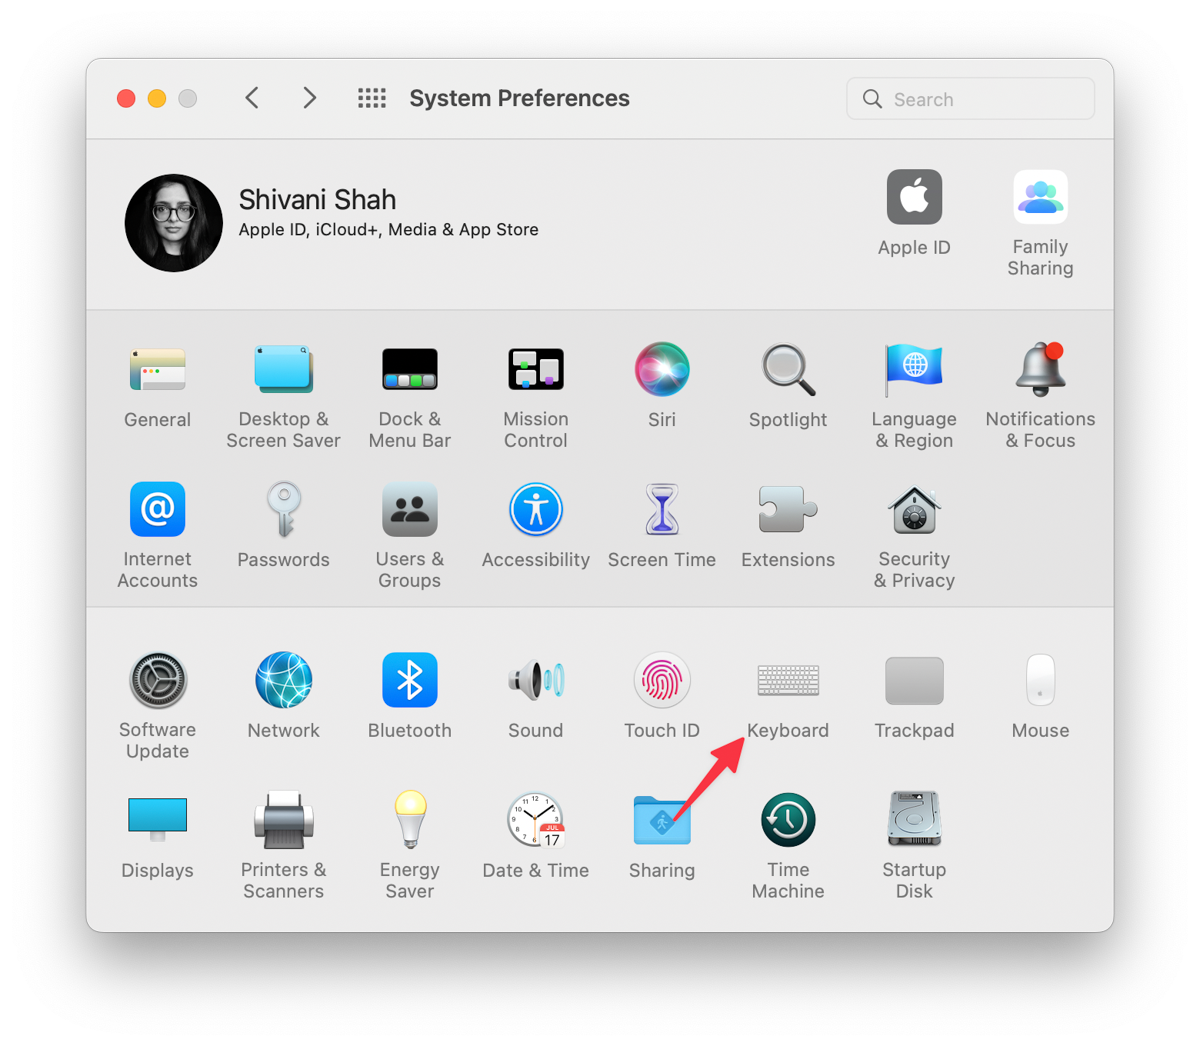
2. Open System Preferences and go to Keyboard.
3. In the Keyboard panel, click on Shortcuts, then App Shortcuts, and then the + sign.
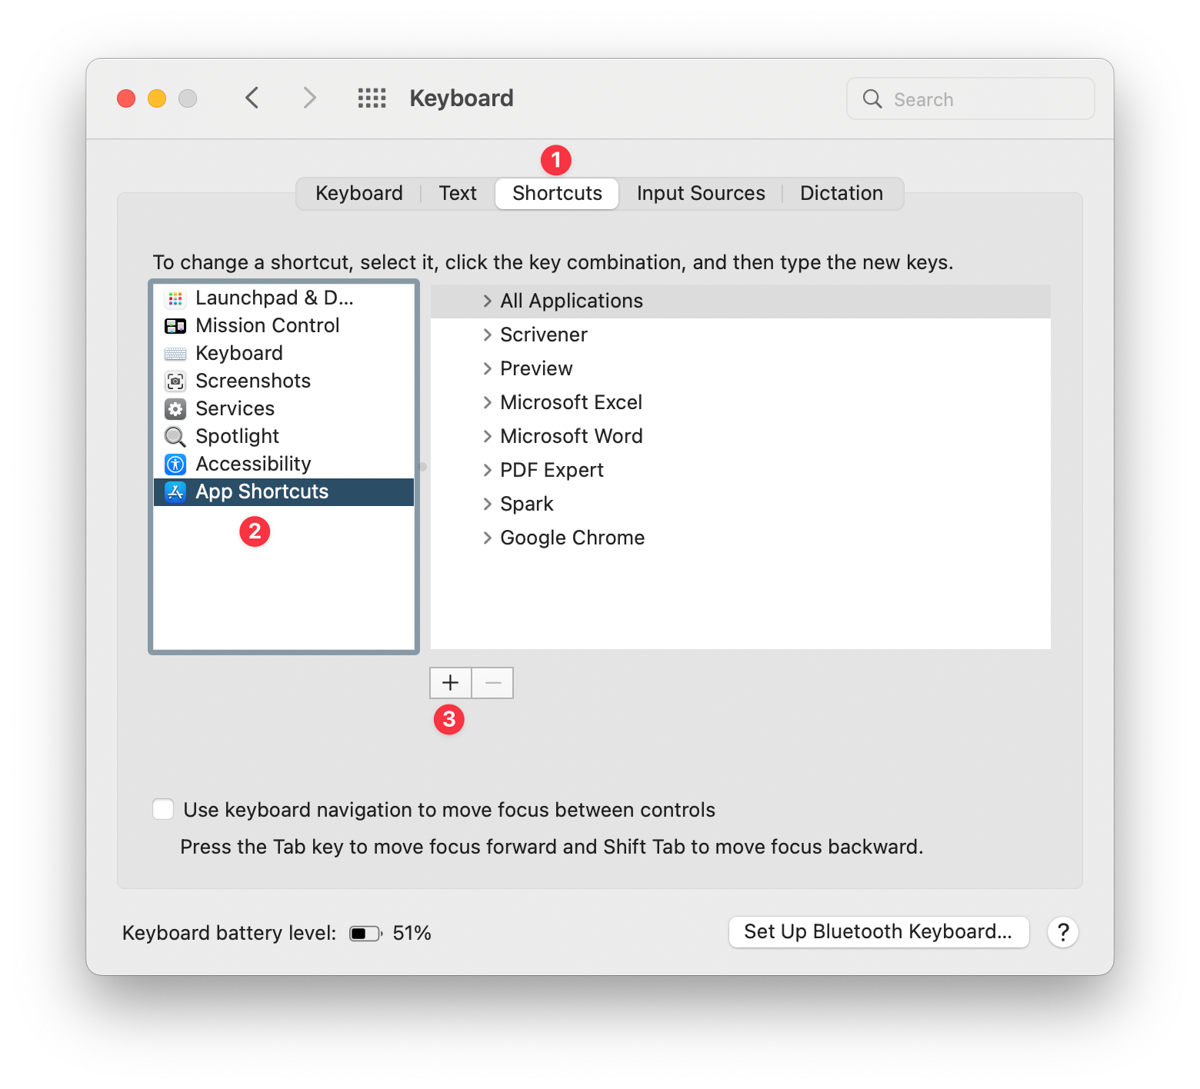
4. Click on All Applications and choose the app you want to create a shortcut for. Type out the exact name of the menu command (as per Step 1), then enter the keyboard shortcut you want to use for this command.
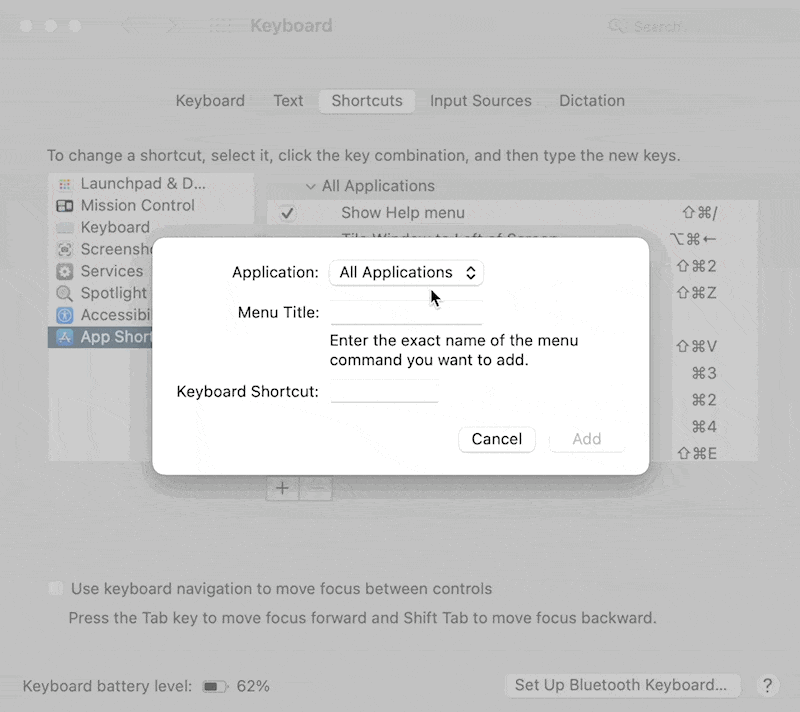
Your new keyboard shortcut is now ready to use.

💡 Tip: You can also change an app’s default keyboard shortcuts to something else that you want. Follow the same steps as above, and the shortcut you set will replace the default shortcut.
The keyboard shortcuts I’ve set using this method that have saved me the most time are in Google Chrome: switching between different profiles.
I have separate profiles set for work and personal browsing, and I easily switch between the two windows by using (Command ⌘ + Shift ⇧ + 1) for work and (Command ⌘ + Shift ⇧ + 2) for personal.
Using hotkeys
Some apps will let you set hotkeys to perform a limited set of actions like showing the app window or performing the app’s core function.
You’ll find this setting in the app’s preferences. Just open the app, use (Command ⌘) + (Comma ,) to pull up the preferences, and then dig around the settings until you find ‘hotkeys’, ‘shortcuts’, or ‘keyboard shortcuts’.
Then click on ‘set hotkeys’ or ‘record shortcut’ (the language will vary, but it’ll be clear where you need to click) and enter the combination you want to use to perform that command.
4. Use Alfred
Alfred is like Mac’s Spotlight feature supercharged. It’s a productivity app that gives you a whole host of ways to get around your computer and the internet using just your keyboard.
Use a hotkey (of course) to open up Alfred, and then start typing.
Find files, folders, and apps
Type in a keyword that’s in the folder name, and Alfred will locate it for you anywhere on your computer. Hit the Return key to open it straight from Alfred. It’s the same for any app you have installed.

For files, press the spacebar before typing the keyword in Alfred; the program will automatically replace the space with an apostrophe and search for files with the keyword in the file name instead of searching for folders.
Do you know some of the file’s contents but not its name? Alfred can find it for you! Type ‘in’ and then a couple of words from the content for Alfred to locate the file.
Search the internet
You can Google something without opening your browser — Alfred will automatically open the Google search results in your default browser.
You can also search for something on specific websites like Amazon, YouTube, or Wikipedia, or create custom searches for websites you use most often.

Browse your bookmarks
Like with file search above, you type in a keyword that’s in the bookmarked website or page name, and Alfred will find it for you. Hit enter to go straight to the website in your browser. Handy when — if you’re anything like me — you’ve been bookmarking websites for years but never clean out the folder!
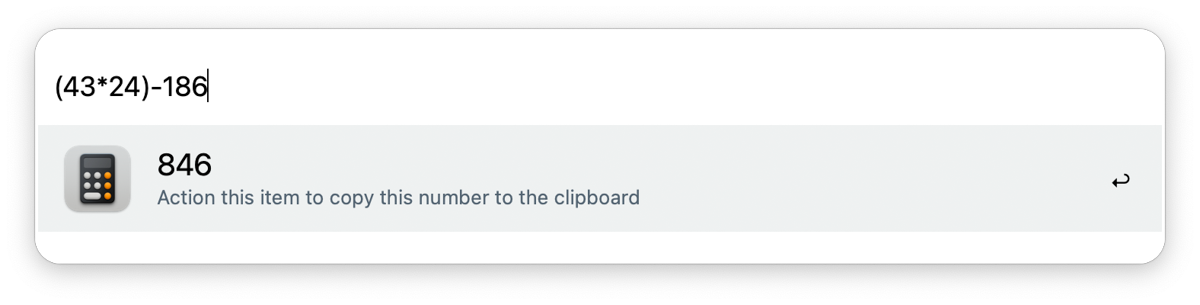
Perform a basic calculation
Start typing out your query into Alfred without opening the calculator — the answer will appear in Alfred itself. You can set it up for advanced calculations too, but since I don’t need to use sin, cos, tan, square root, etc., I’ve kept it simple.
Control your MacOS
You can pull up or empty your computer’s trash, turn the volume up or down/mute or unmute the system, eject a hard drive, quit or force quit an app, and even restart or shut down your computer from Alfred.
And this is just the tip of the iceberg. Some of these actions are only available with a paid licence to Alfred, but I can guarantee you it’s worth it. Alfred’s stats tell me that, since I downloaded it in October 2021 (one year and nine months ago), I’ve used it 15,086 times at an average of 23.9 times per day!
There are alternatives to Alfred such as Raycast and Quicksilver. I haven’t tried any of them, but they might be worth exploring if you want to check out different options before committing to one.
I’m working on a blog post that details how I use Alfred, from setting up custom web searches to using workflows — coming soon!